
We had decided some time ago that we wanted to paint or stain our back porch, so it got added to the long honey do list. While we waited to get around to it, I did a little research to figure out exactly what I wanted to use. Some of the basic options out there include semi-transparent paint, water-based stain and acid-based stain. After weighing out all of our options, I decided acid stain was the best way to go. Sherwin-Williams sells a H&C Concrete Etching Solution in a variety of different colors and we ended up choosing Rusted Fence. (I originally bought Crumbled Brick, but after taking it home and doing a test spot we decided that it was too red/orange for our taste). I had approximately 400 square feet to stain and two bottles was plenty.
The first step of the process is just cleaning your concrete. Some places that I read recommended buying cleaning solutions, degreasers, etc.; however, I just powerwashed mine and that seemed adequate enough. Here is a look at the porch after I cleaned it.
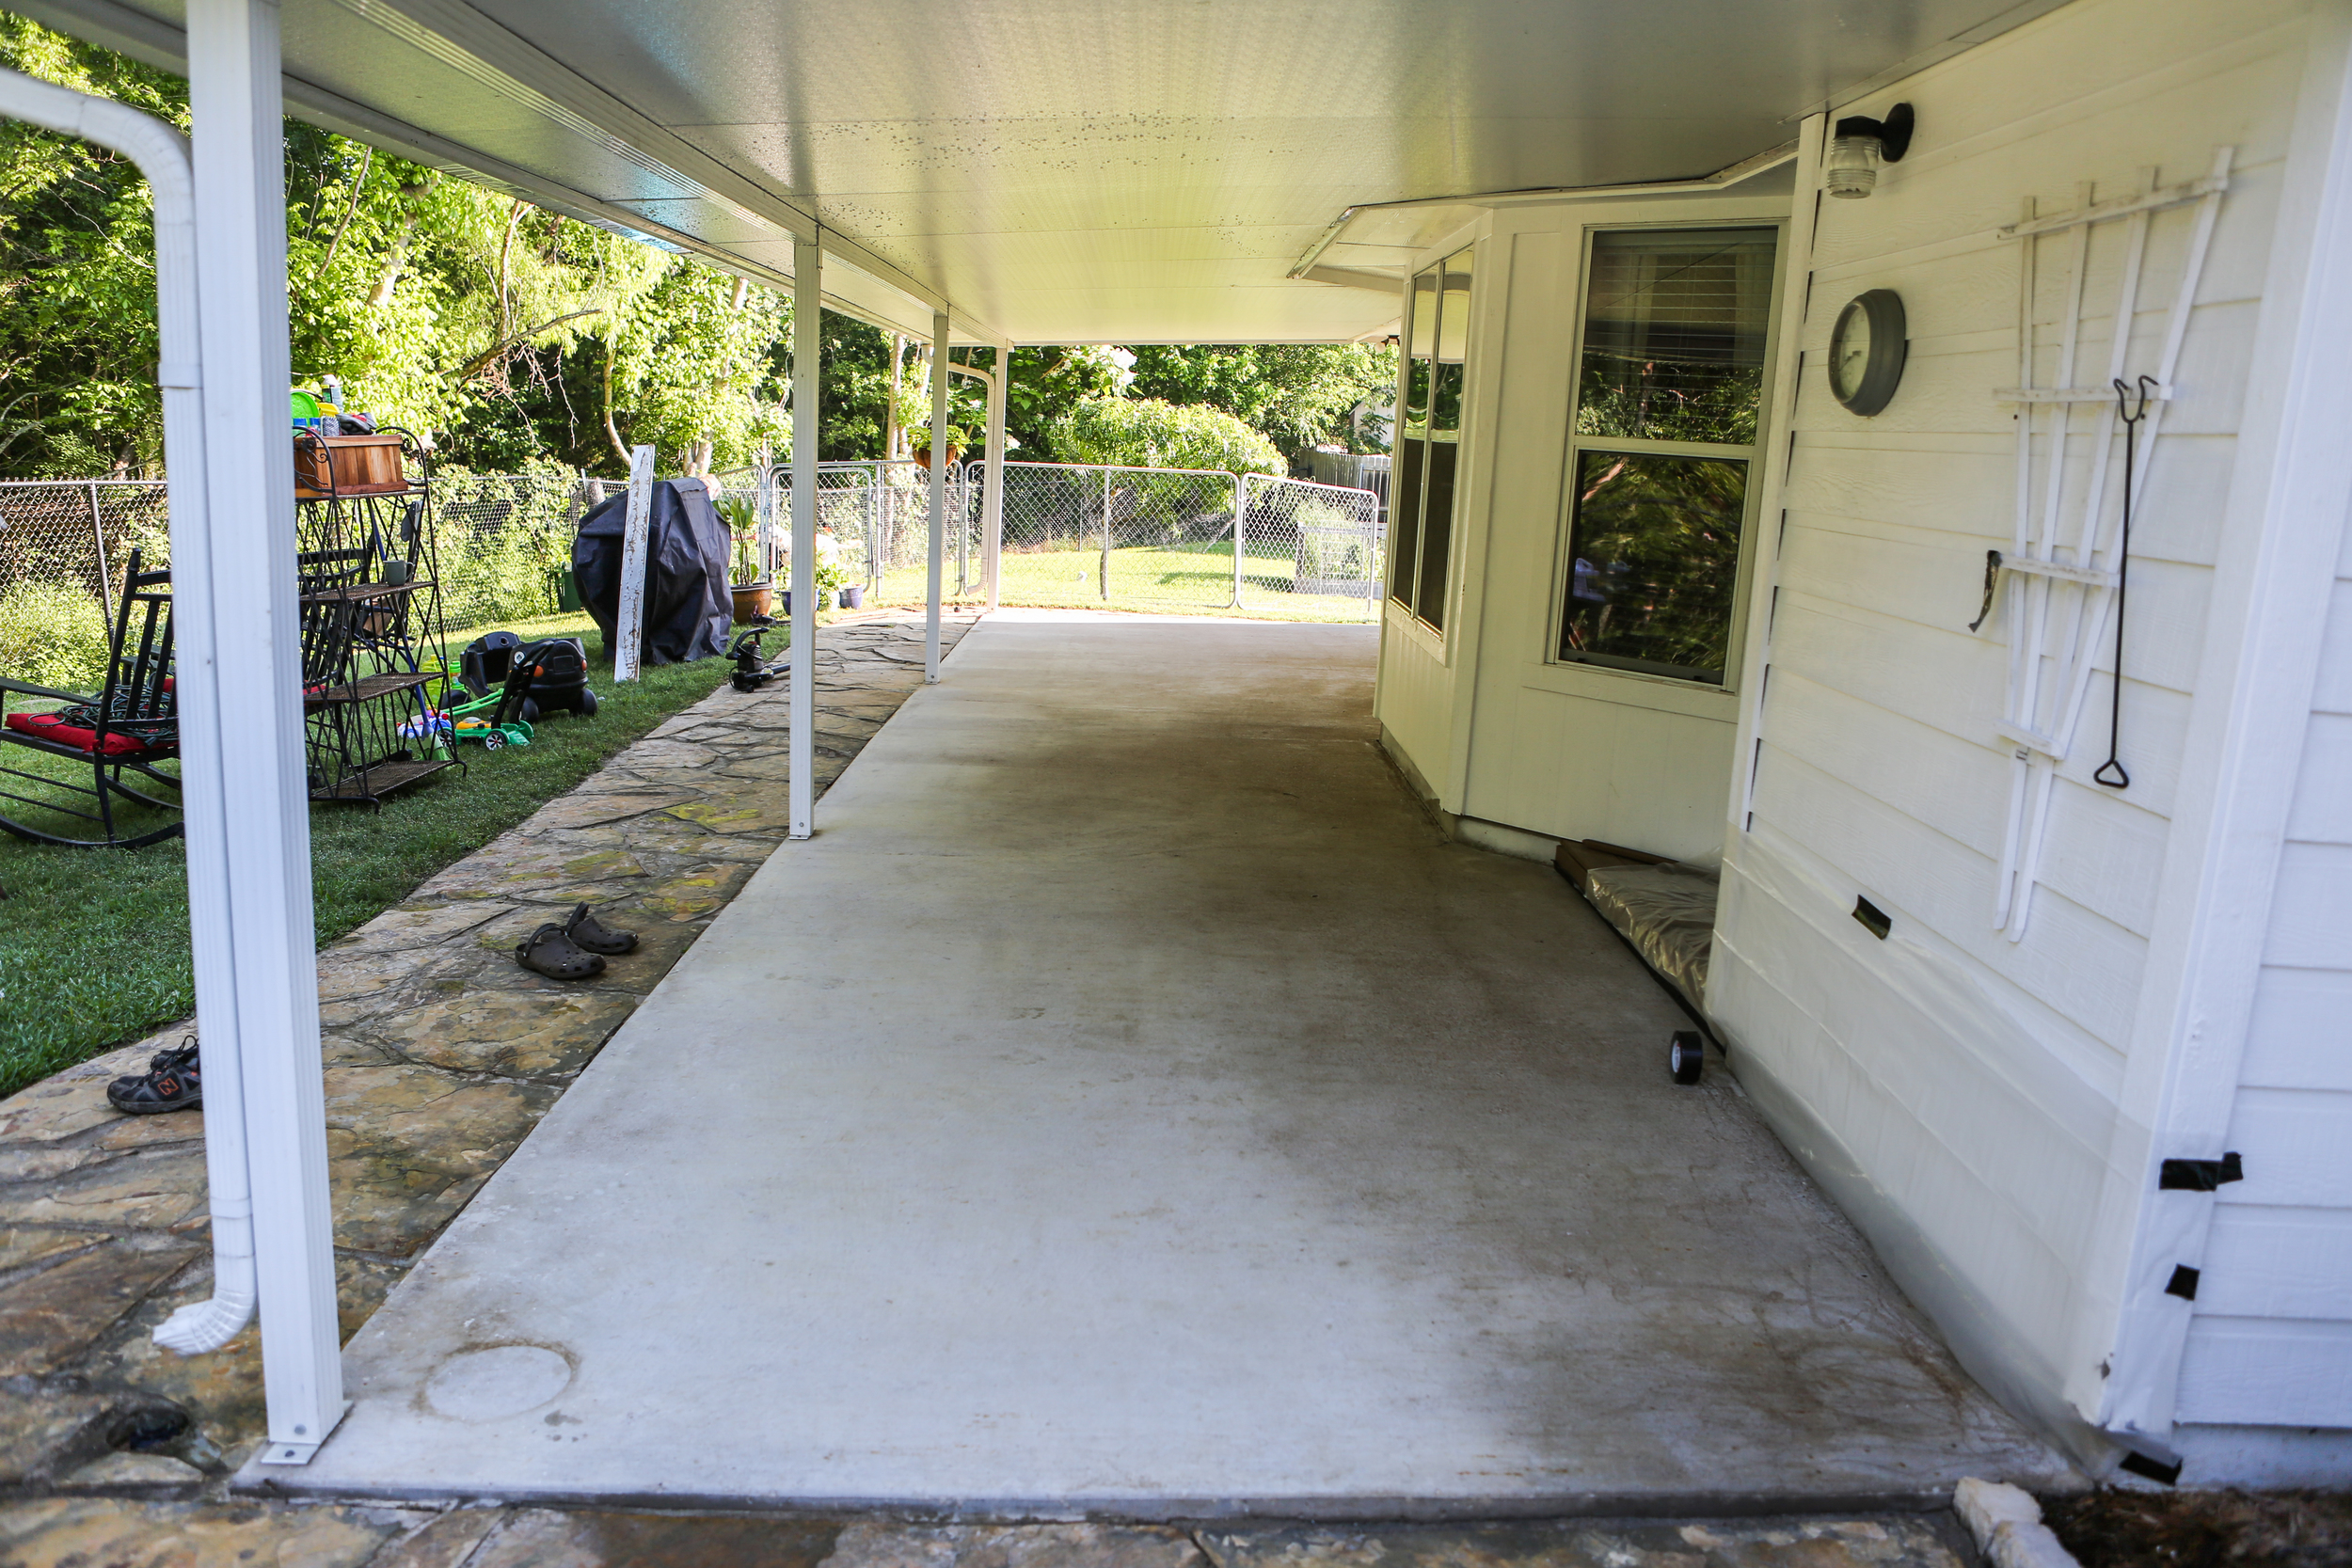


I powerwashed it the evening before and let it dry overnight. The next step was taping plastic to everything I didn't want stain on. I didn't have any brick that would be exposed, but I was told that brick is very susceptible to staining, so extra care should be taken if you will be staining next to brick.
Although you can dilute the stain to get a lighter finish, I did not. I honestly just didn't have the time to experiment and wait for more test spots to dry. I used a pump up sprayer to put it down and my dad helped by using a paint brush to cut in around the poles. You have to use an ALL PLASTIC pump up sprayer; any metal pieces will react with the acid in the stain. I started out spraying it on pretty thick, but quickly realized that at that rate I would have ran out of stain before I even finished half of the porch. All you really need is a thin even coat. If the stain is starting to pool, then you are probably putting too much down. I was pretty worried the entire time that I wasn't putting enough down and it seemed like the stain was a completely different color than I had picked out, but it won't look the way it is supposed to until the reaction is done.


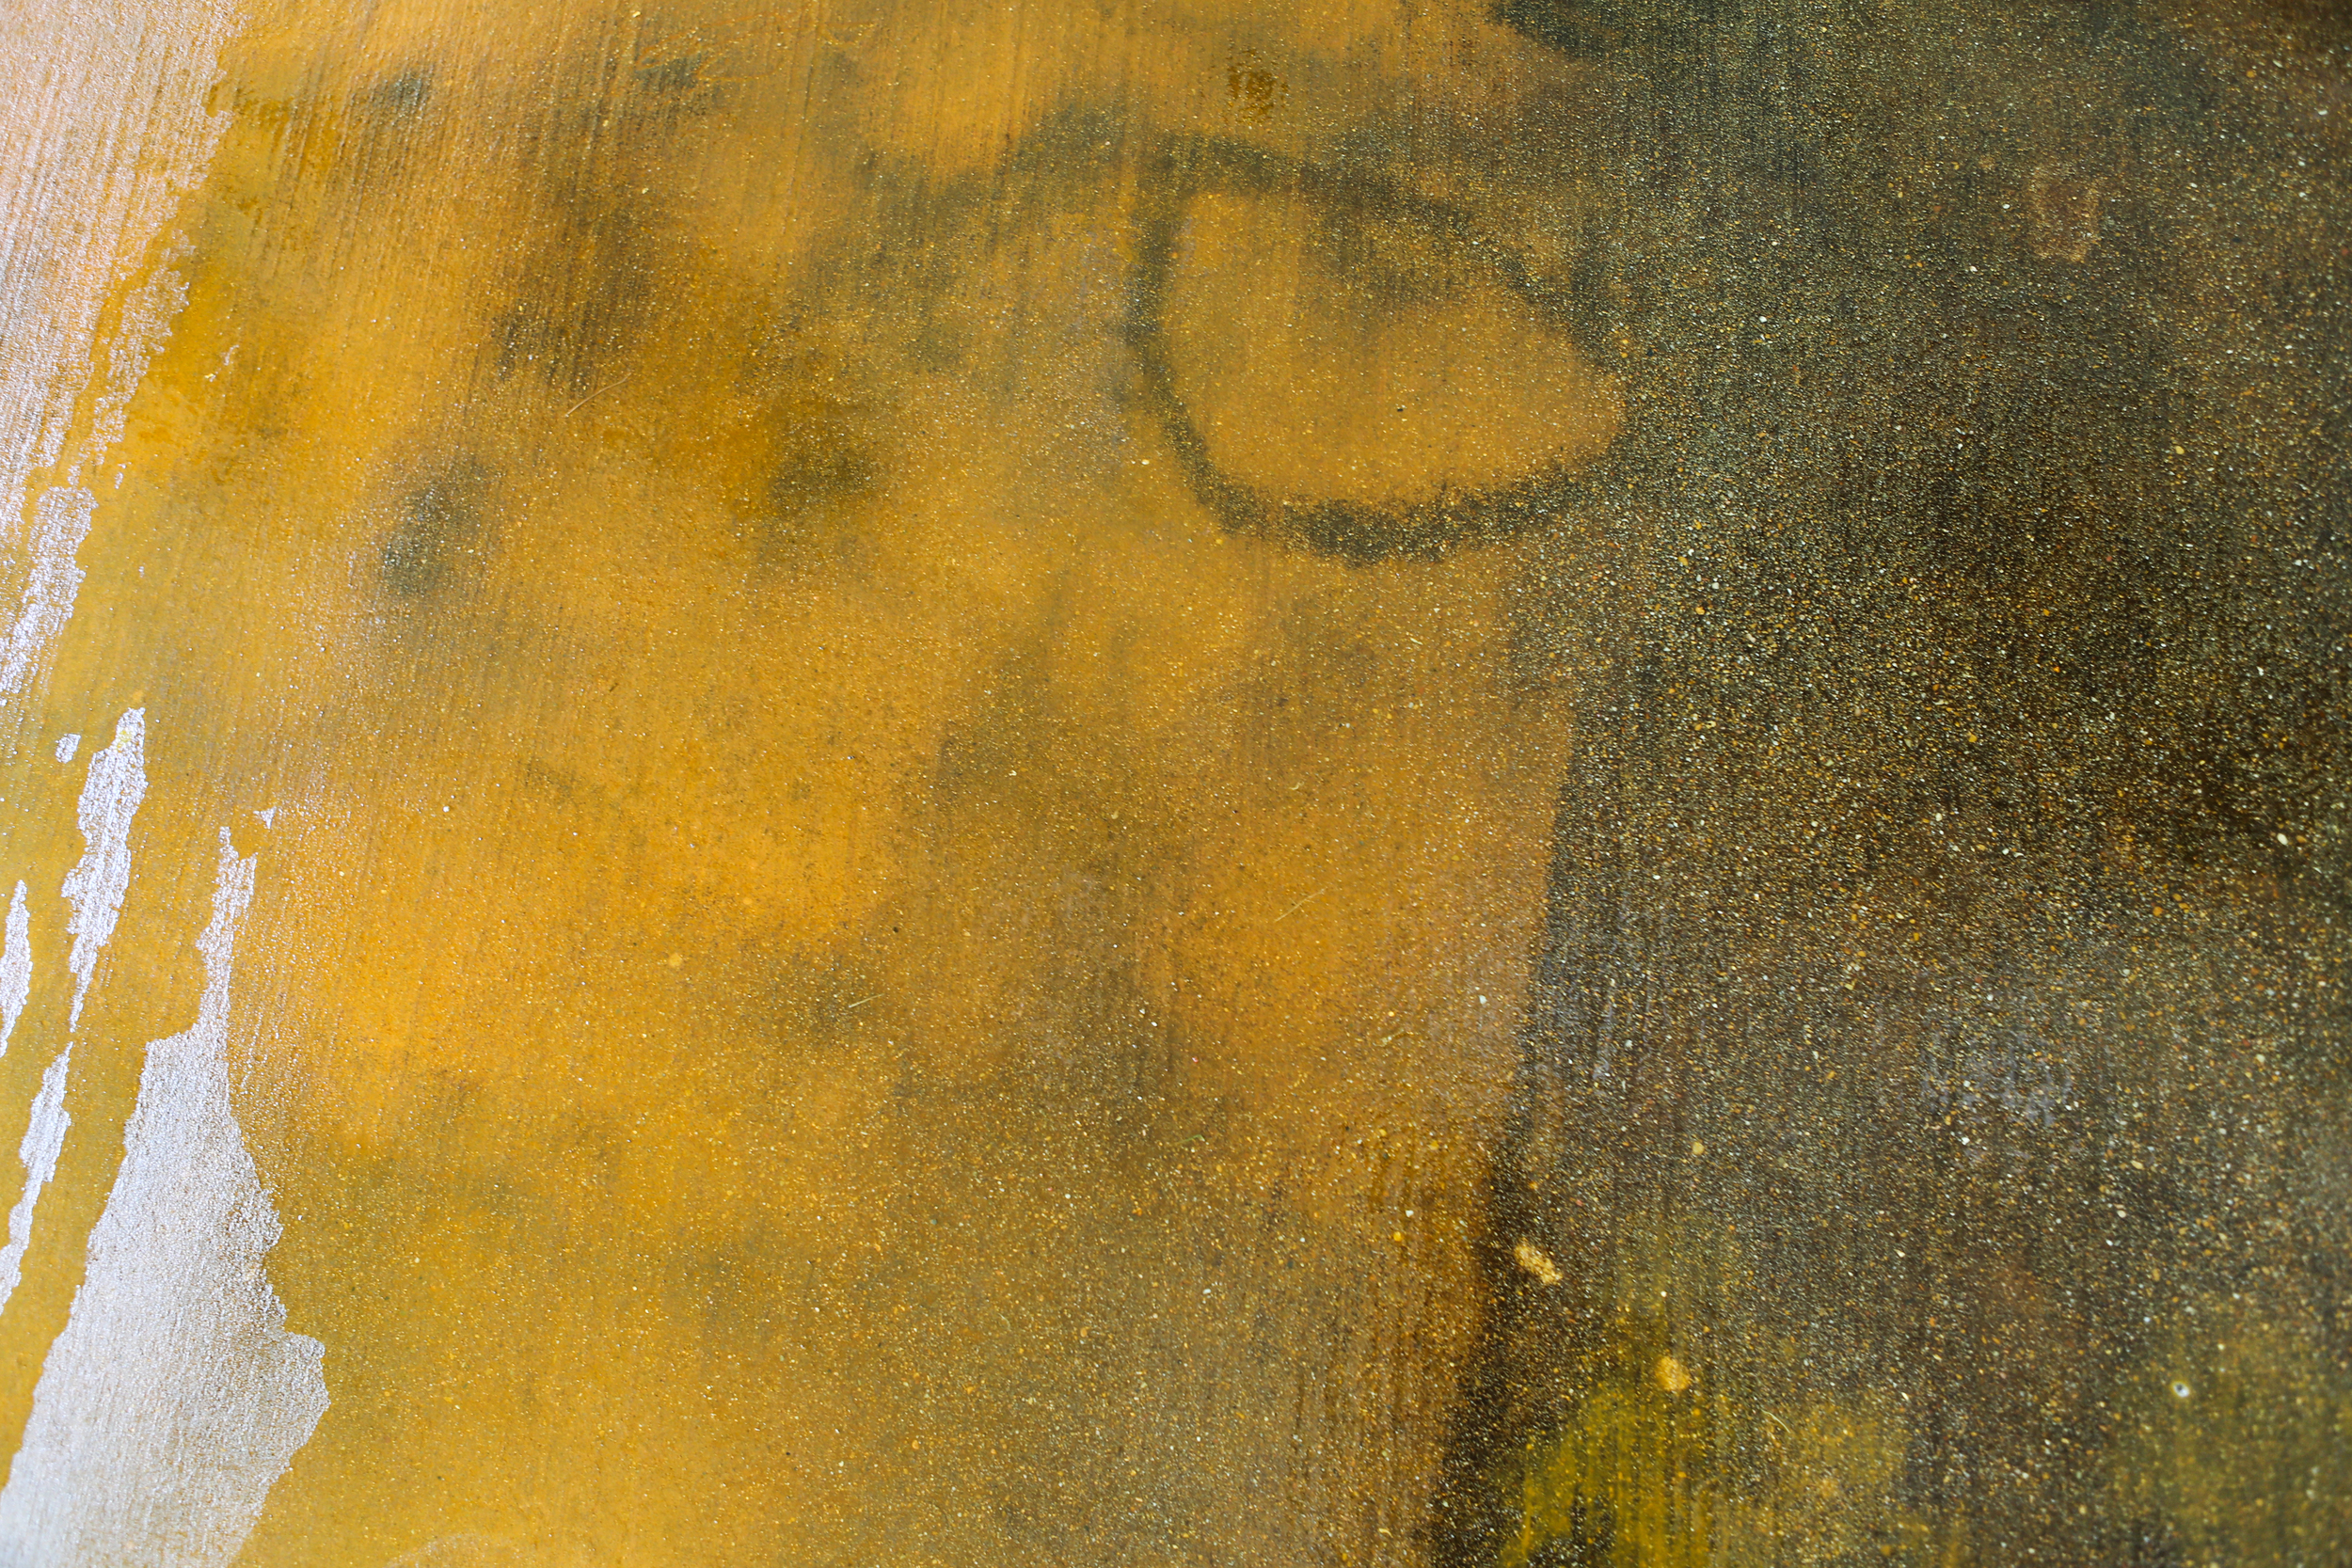
As it starts to react and dry it will turn a different color and develop a powdery coat. I am not sure if the different color option have a differing looks when they are finished, but mine turned an orangish yellow. You are supposed to wait 4 hours for the reaction to complete. I waited more like 6 hours from the time I finished spraying.
The next step is to wash off the powdery residue. This was one of the more fun steps because you finally get to see what the concrete will really look like. At first we were using a hose and broom to scrub the concrete. However, I ended up just using my powerwasher again on a low setting to remove the residue, which worked really well. You can see in the far right picture below how obvious a difference there is as I washed the yellow residue away. After that is all done, the next step is to wait for the porch to dry off. My porch is covered and the majority is shaded for most of the day. I finished washing it down around 4 pm and planned on putting the first sealer coat down at 9 pm, but decided I wanted to wait until the next morning so that it would be more dry.


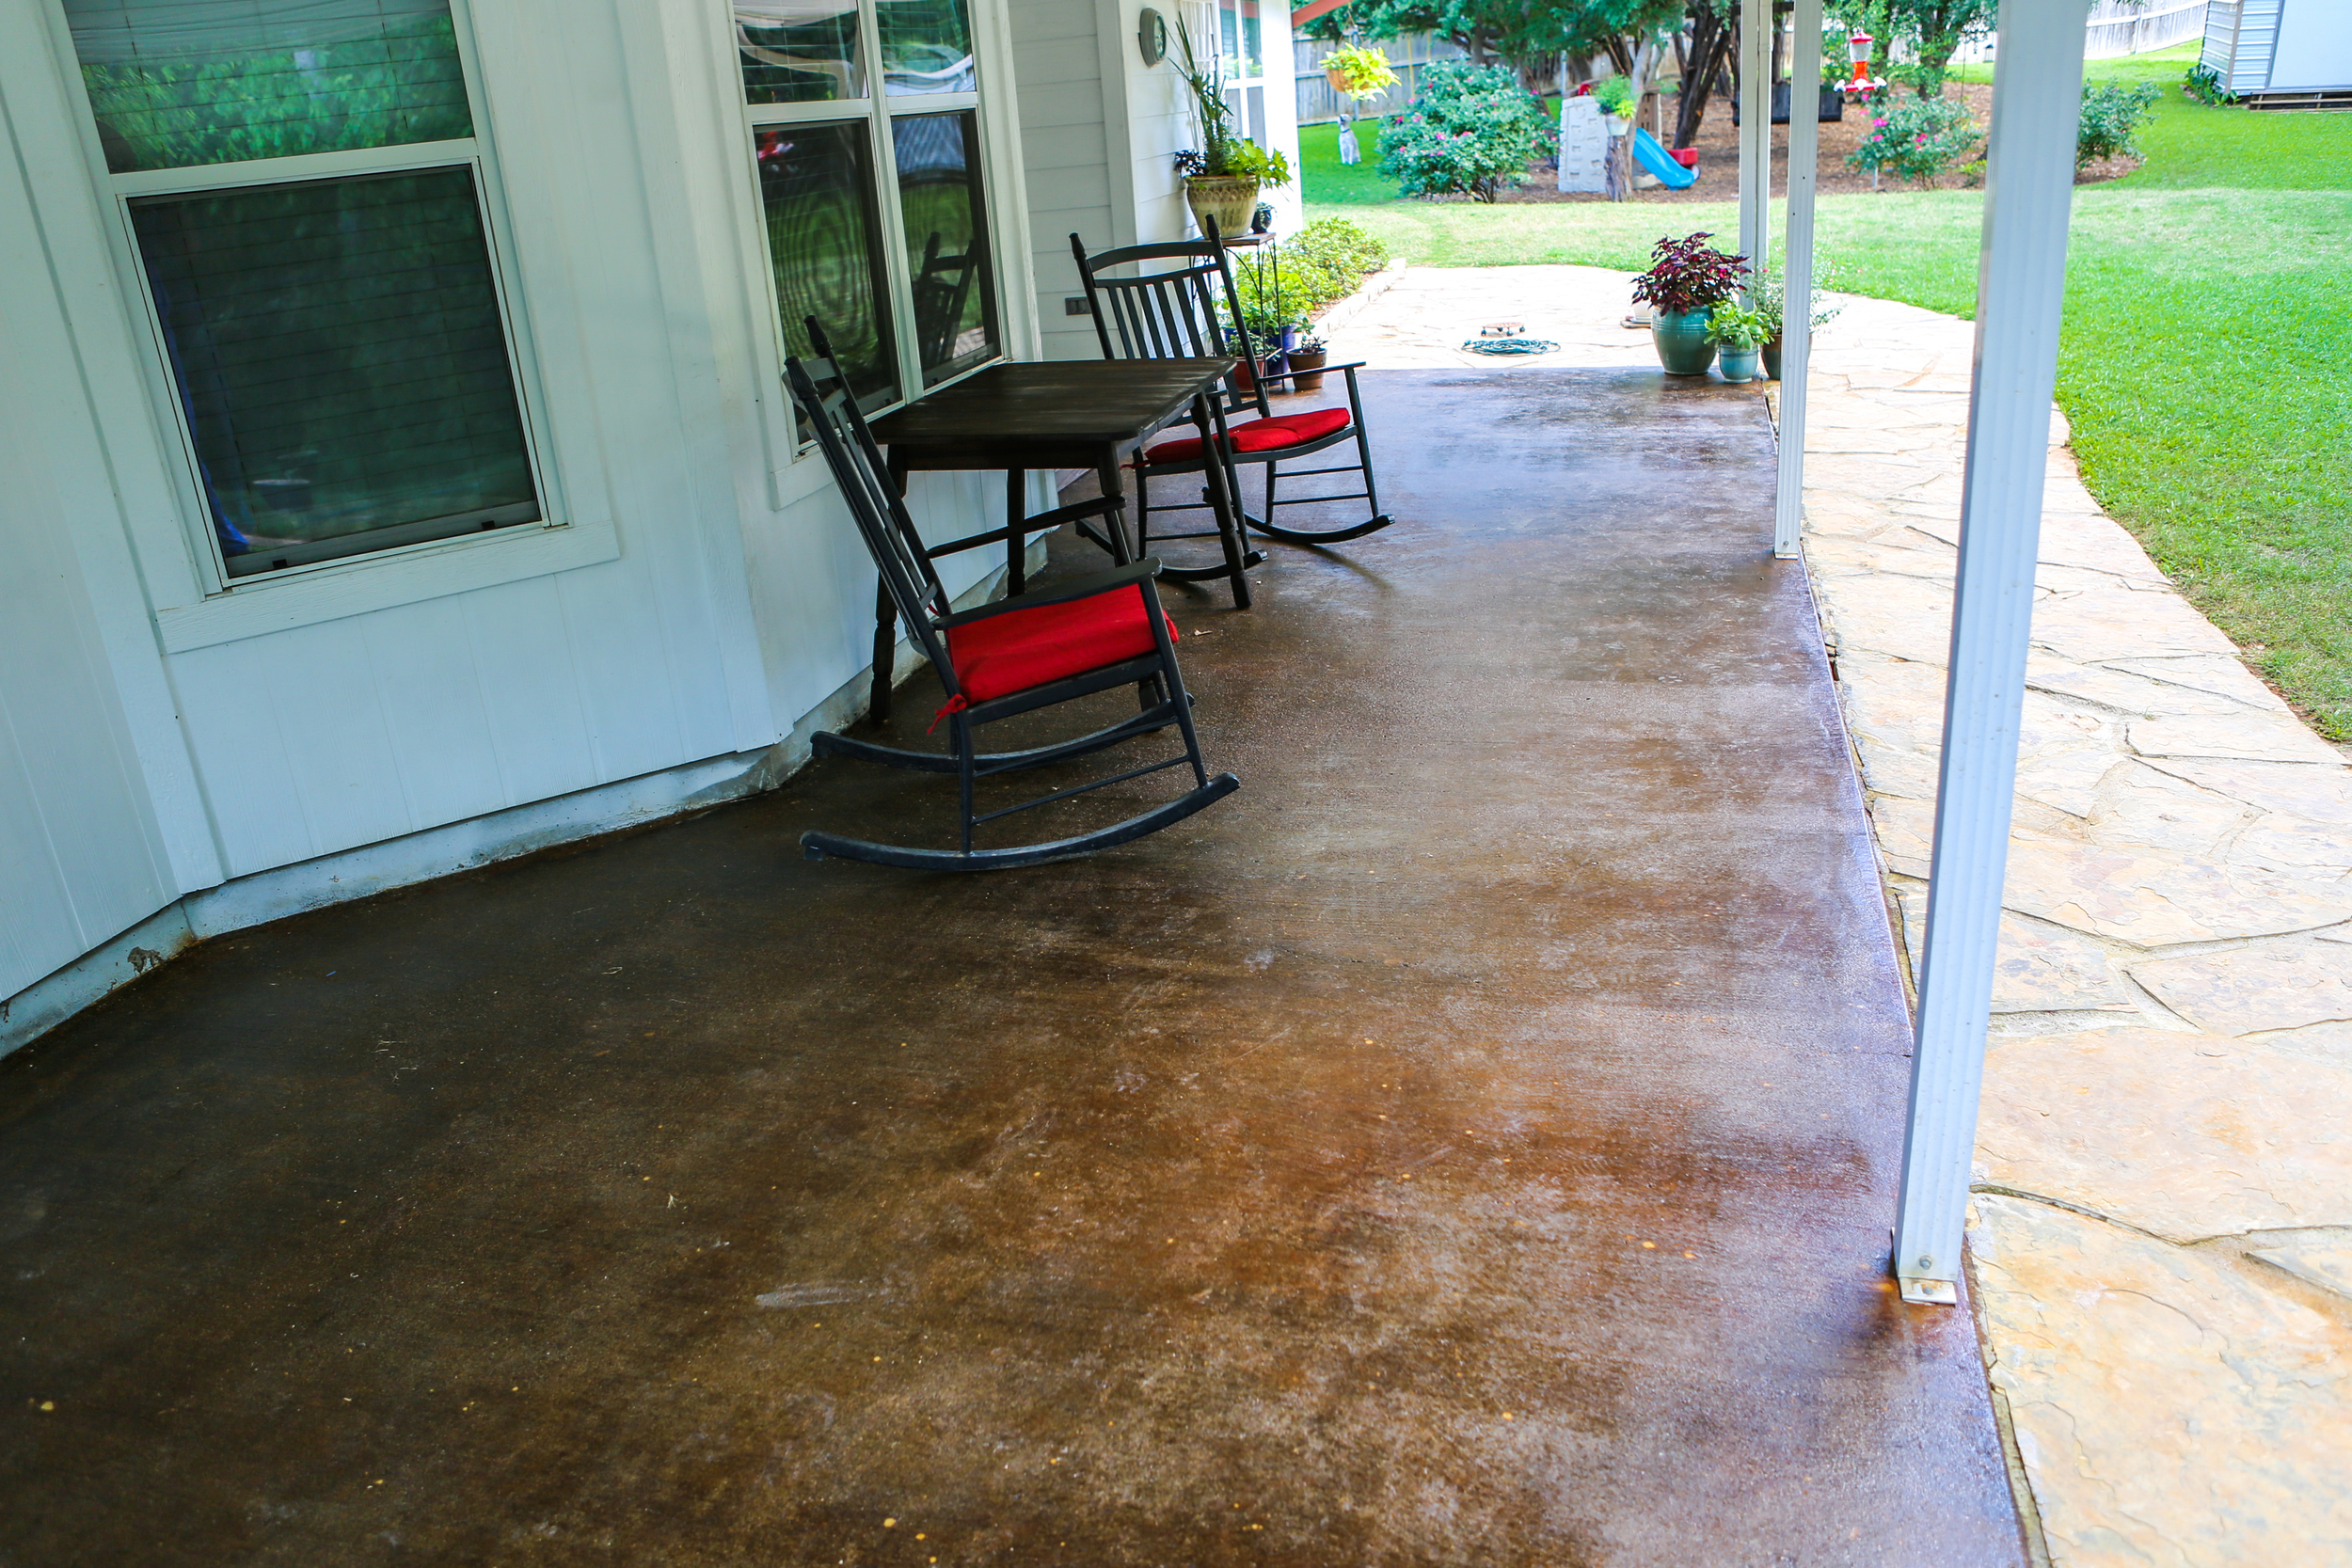
For a sealer I used H&C® Concrete Sealer Solid Color Solvent-Based (clear gloss) from Sherwin-Williams. It was recommended that I use two coats and each gallon is only supposed to cover 200 square feet. However, i only needed 1 gallon per coat to cover all ~400 square feet of my patio. I did two coats of sealer, which really brings out the finish. I would definitely recommend waiting the entire 12 hours (as instructed) between each coat. I was in a rush and only waited about 7-8 hours. It seemed like it was extra sticky the second coat and if I didn't move fast enough some of the second coat acted like it was coming back up on the roller.
IMPORTANT NOTE: With just the sealer the water would bead up on the porch and it was pretty slick when it got wet (our little guy got a bloody lip after slipping on it). I have since gone back and added another coat of sealer with H&C® SharkGrip® Slip Resistant Additive in order to make it less slippery and it worked great! So I would definitely recommend using the sealer + slip resistant additive for your last coat.


You can tell from the pictures above that the sealer changes the finish from a dull brown to a more polished finish. Take a look at the finished product below. I wish I could have gotten some pictures before all the new dog footprints showed up, but oh well!

Total cost: 2 (Rusted Fence) Concrete Etching Solution + 2 gallons of Sealer + one bottle of Slip resistant additive = $240
Total time working time: 3 hours initial clean up + 2.5 hours taping off and staining + 1.5 hour cleaning up residue + 1 hour per coat of sealer (which was 2) = 9 hours of total working time.
If you like this HOW TO then be sure to check out my GIVING TREE post and also check out Lauren's Etsy Shop for some awesome art!